
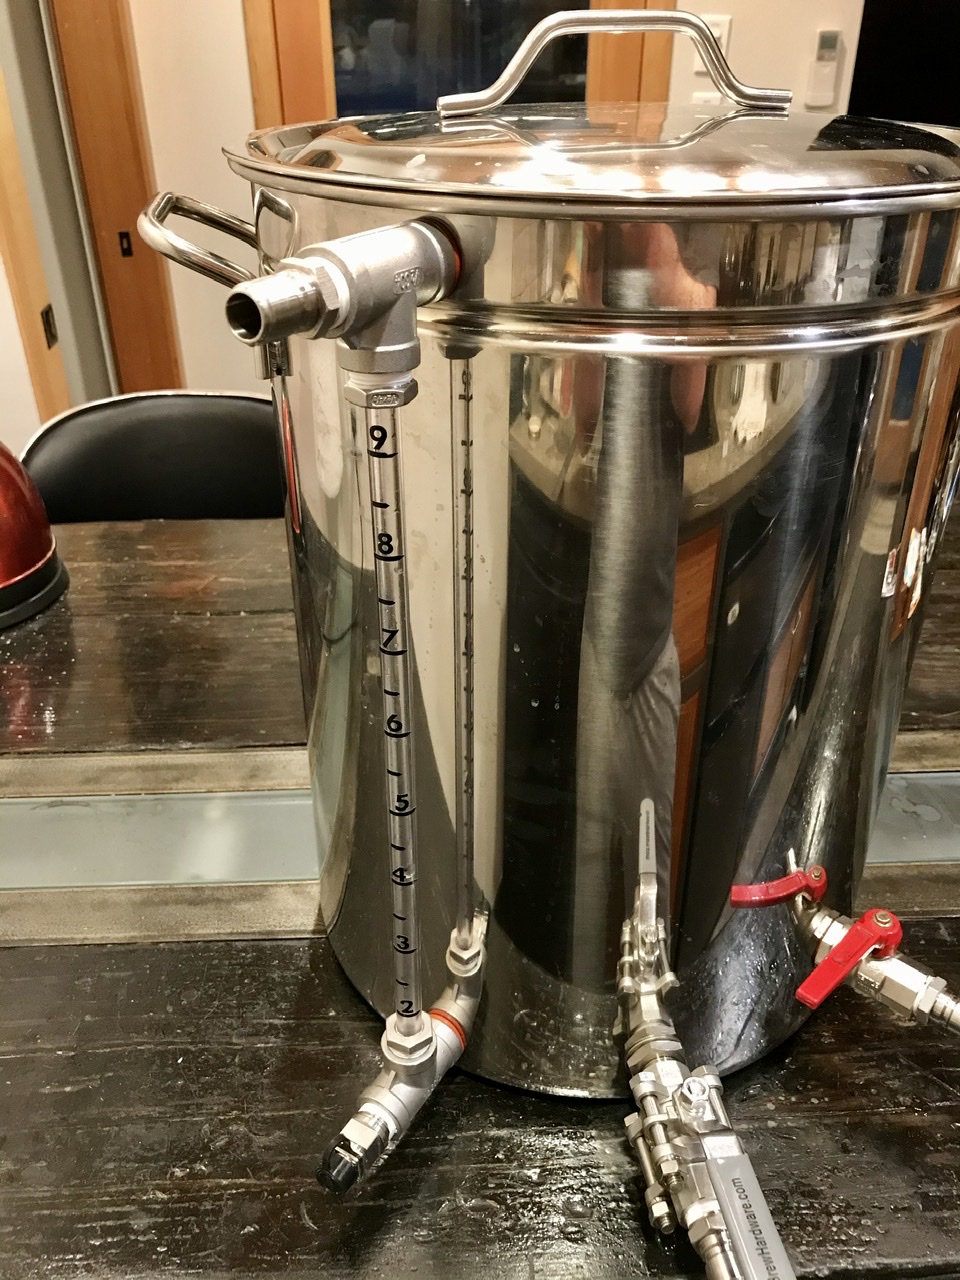
After a couple of brews coming a bit under on original gravity, I decided I needed to make some measurements during mash to see what was happening. One of the measurements needed is volume of liquid. One way to do this is to install a sight glass on the brewpot.
Brew hardware sells sight glass kits that fit the bill perfectly. Bobby from brewhardware.com does a great job going over the options in this video.
They have many videos on installation and calibration so no need to rehash those details here.
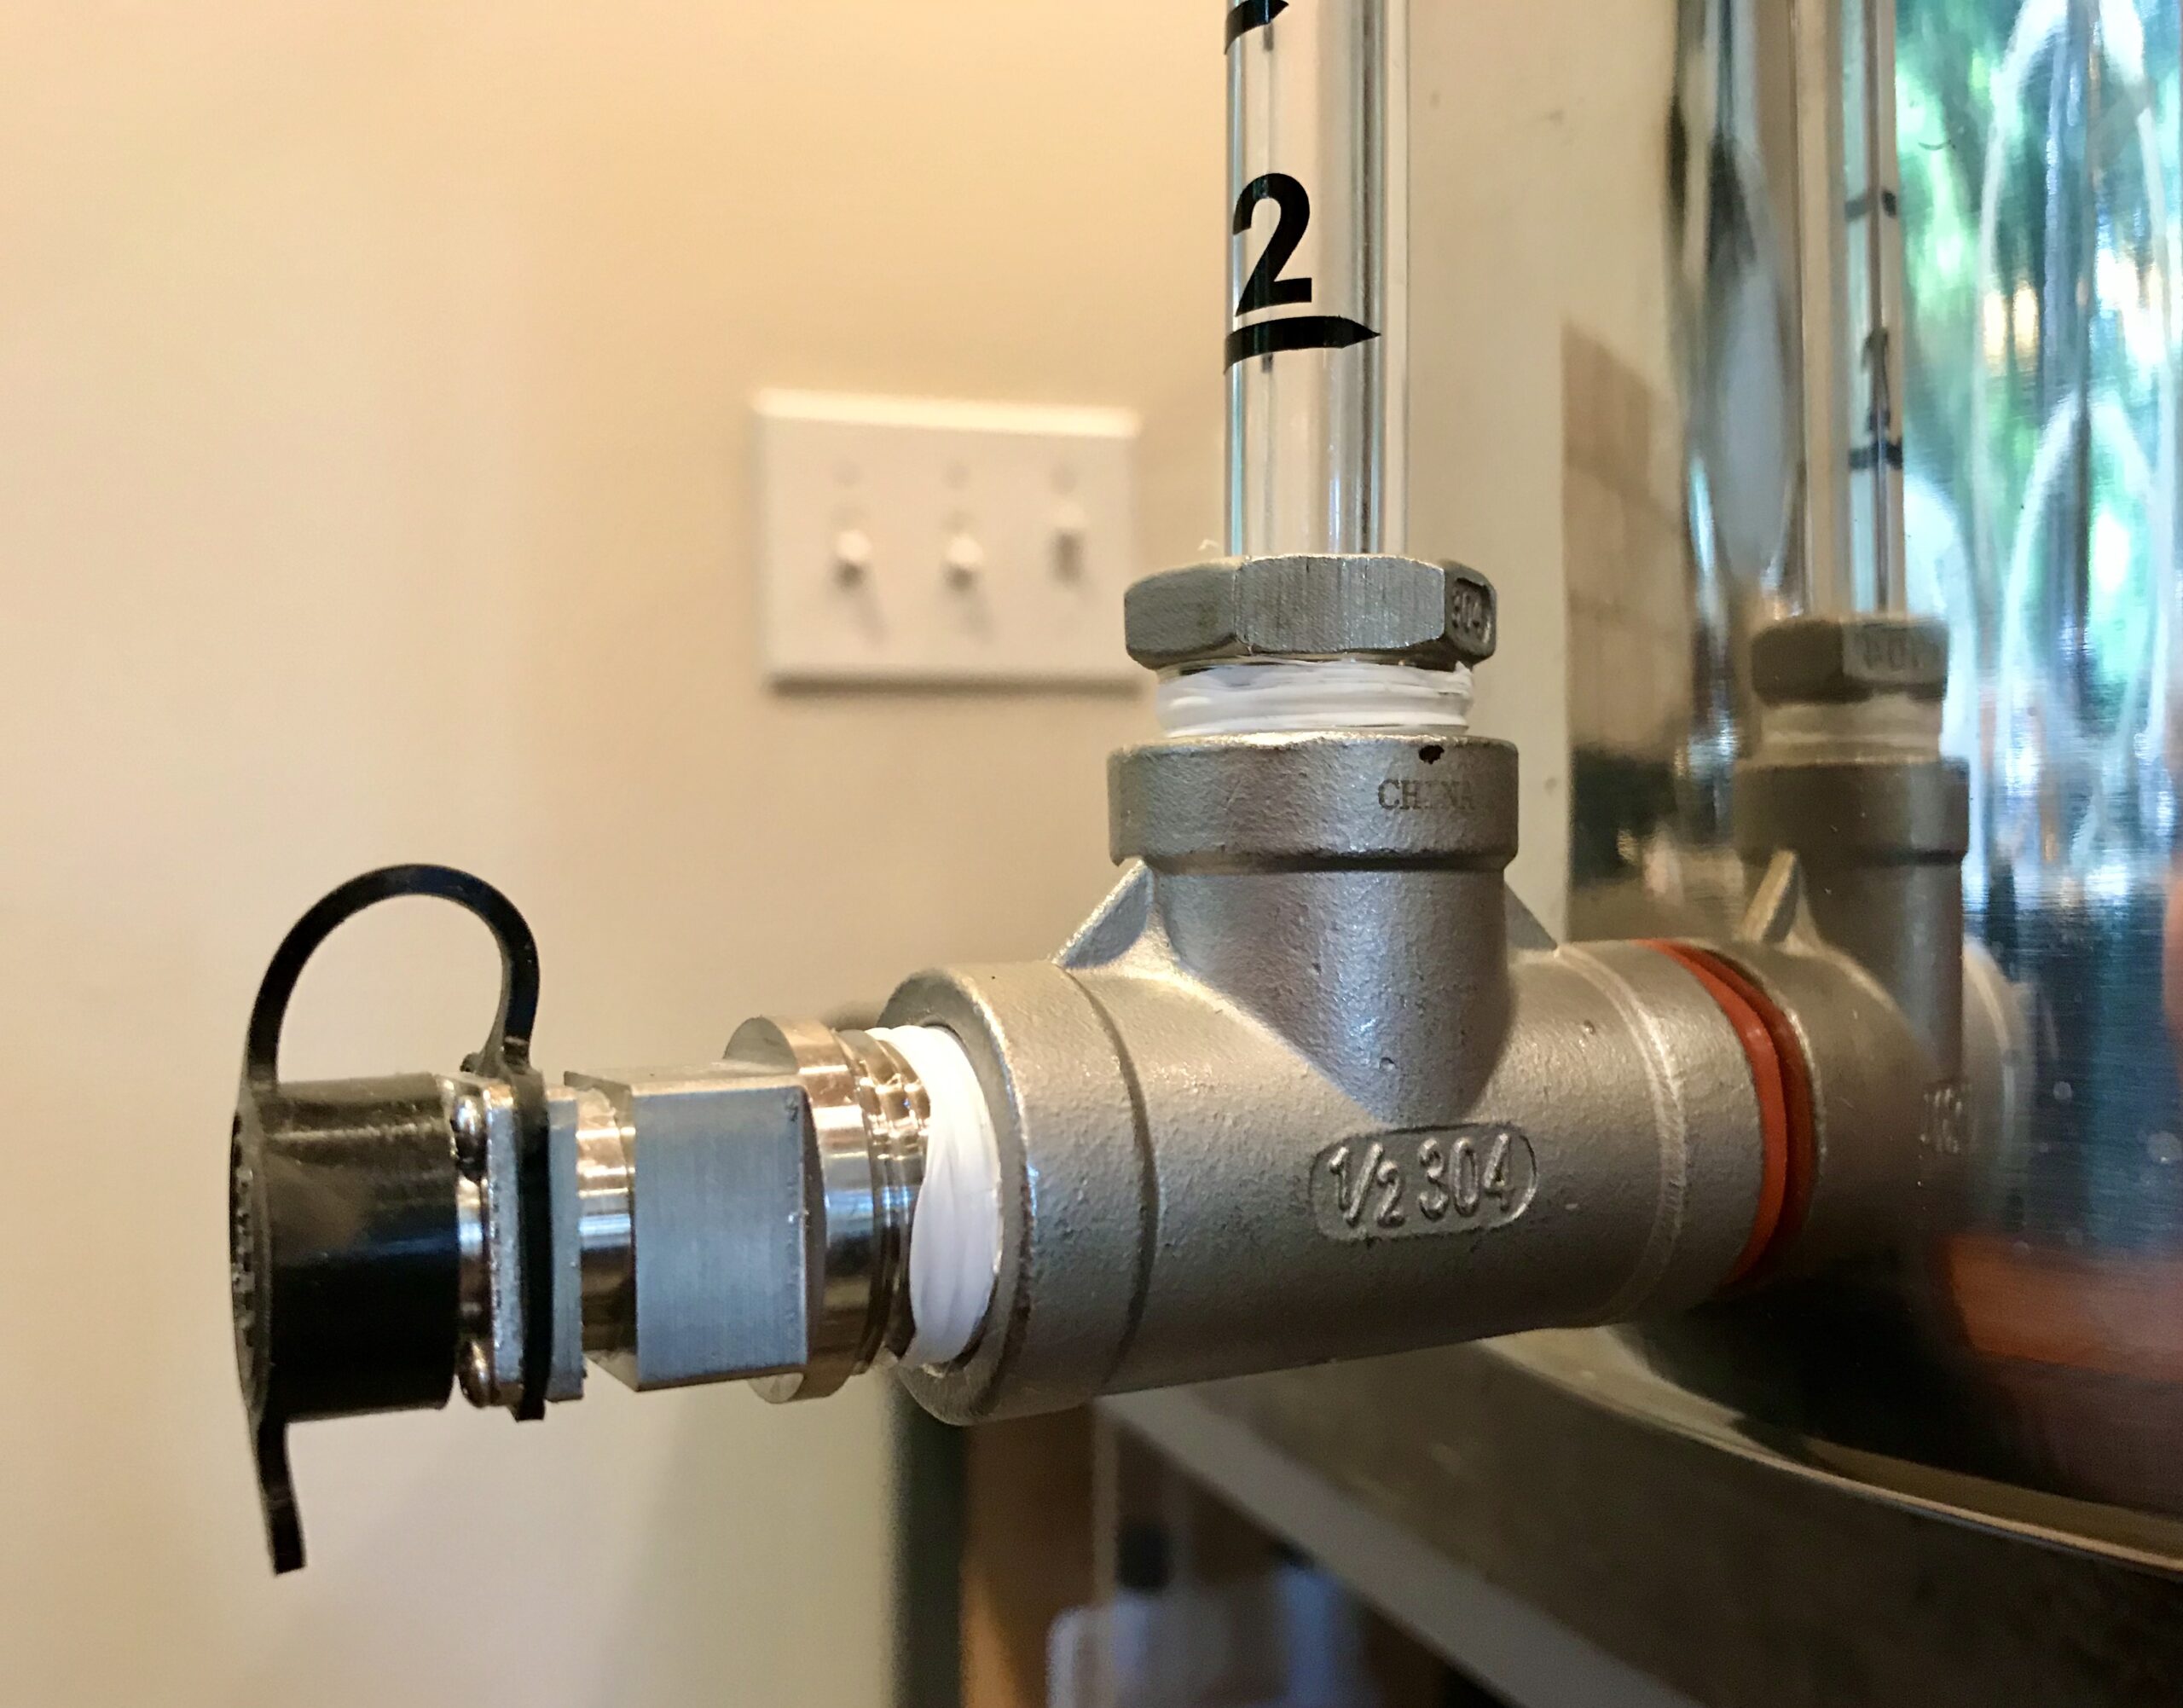
The kits attach to the bottom of the kettle with either a NPT elbow or a tee. The tee allows for the fitting to be used as both the sight glass base and a thermometer port.
Conveniently, this can be used as the thermal probe port in my setup.
Sight Glass Modification
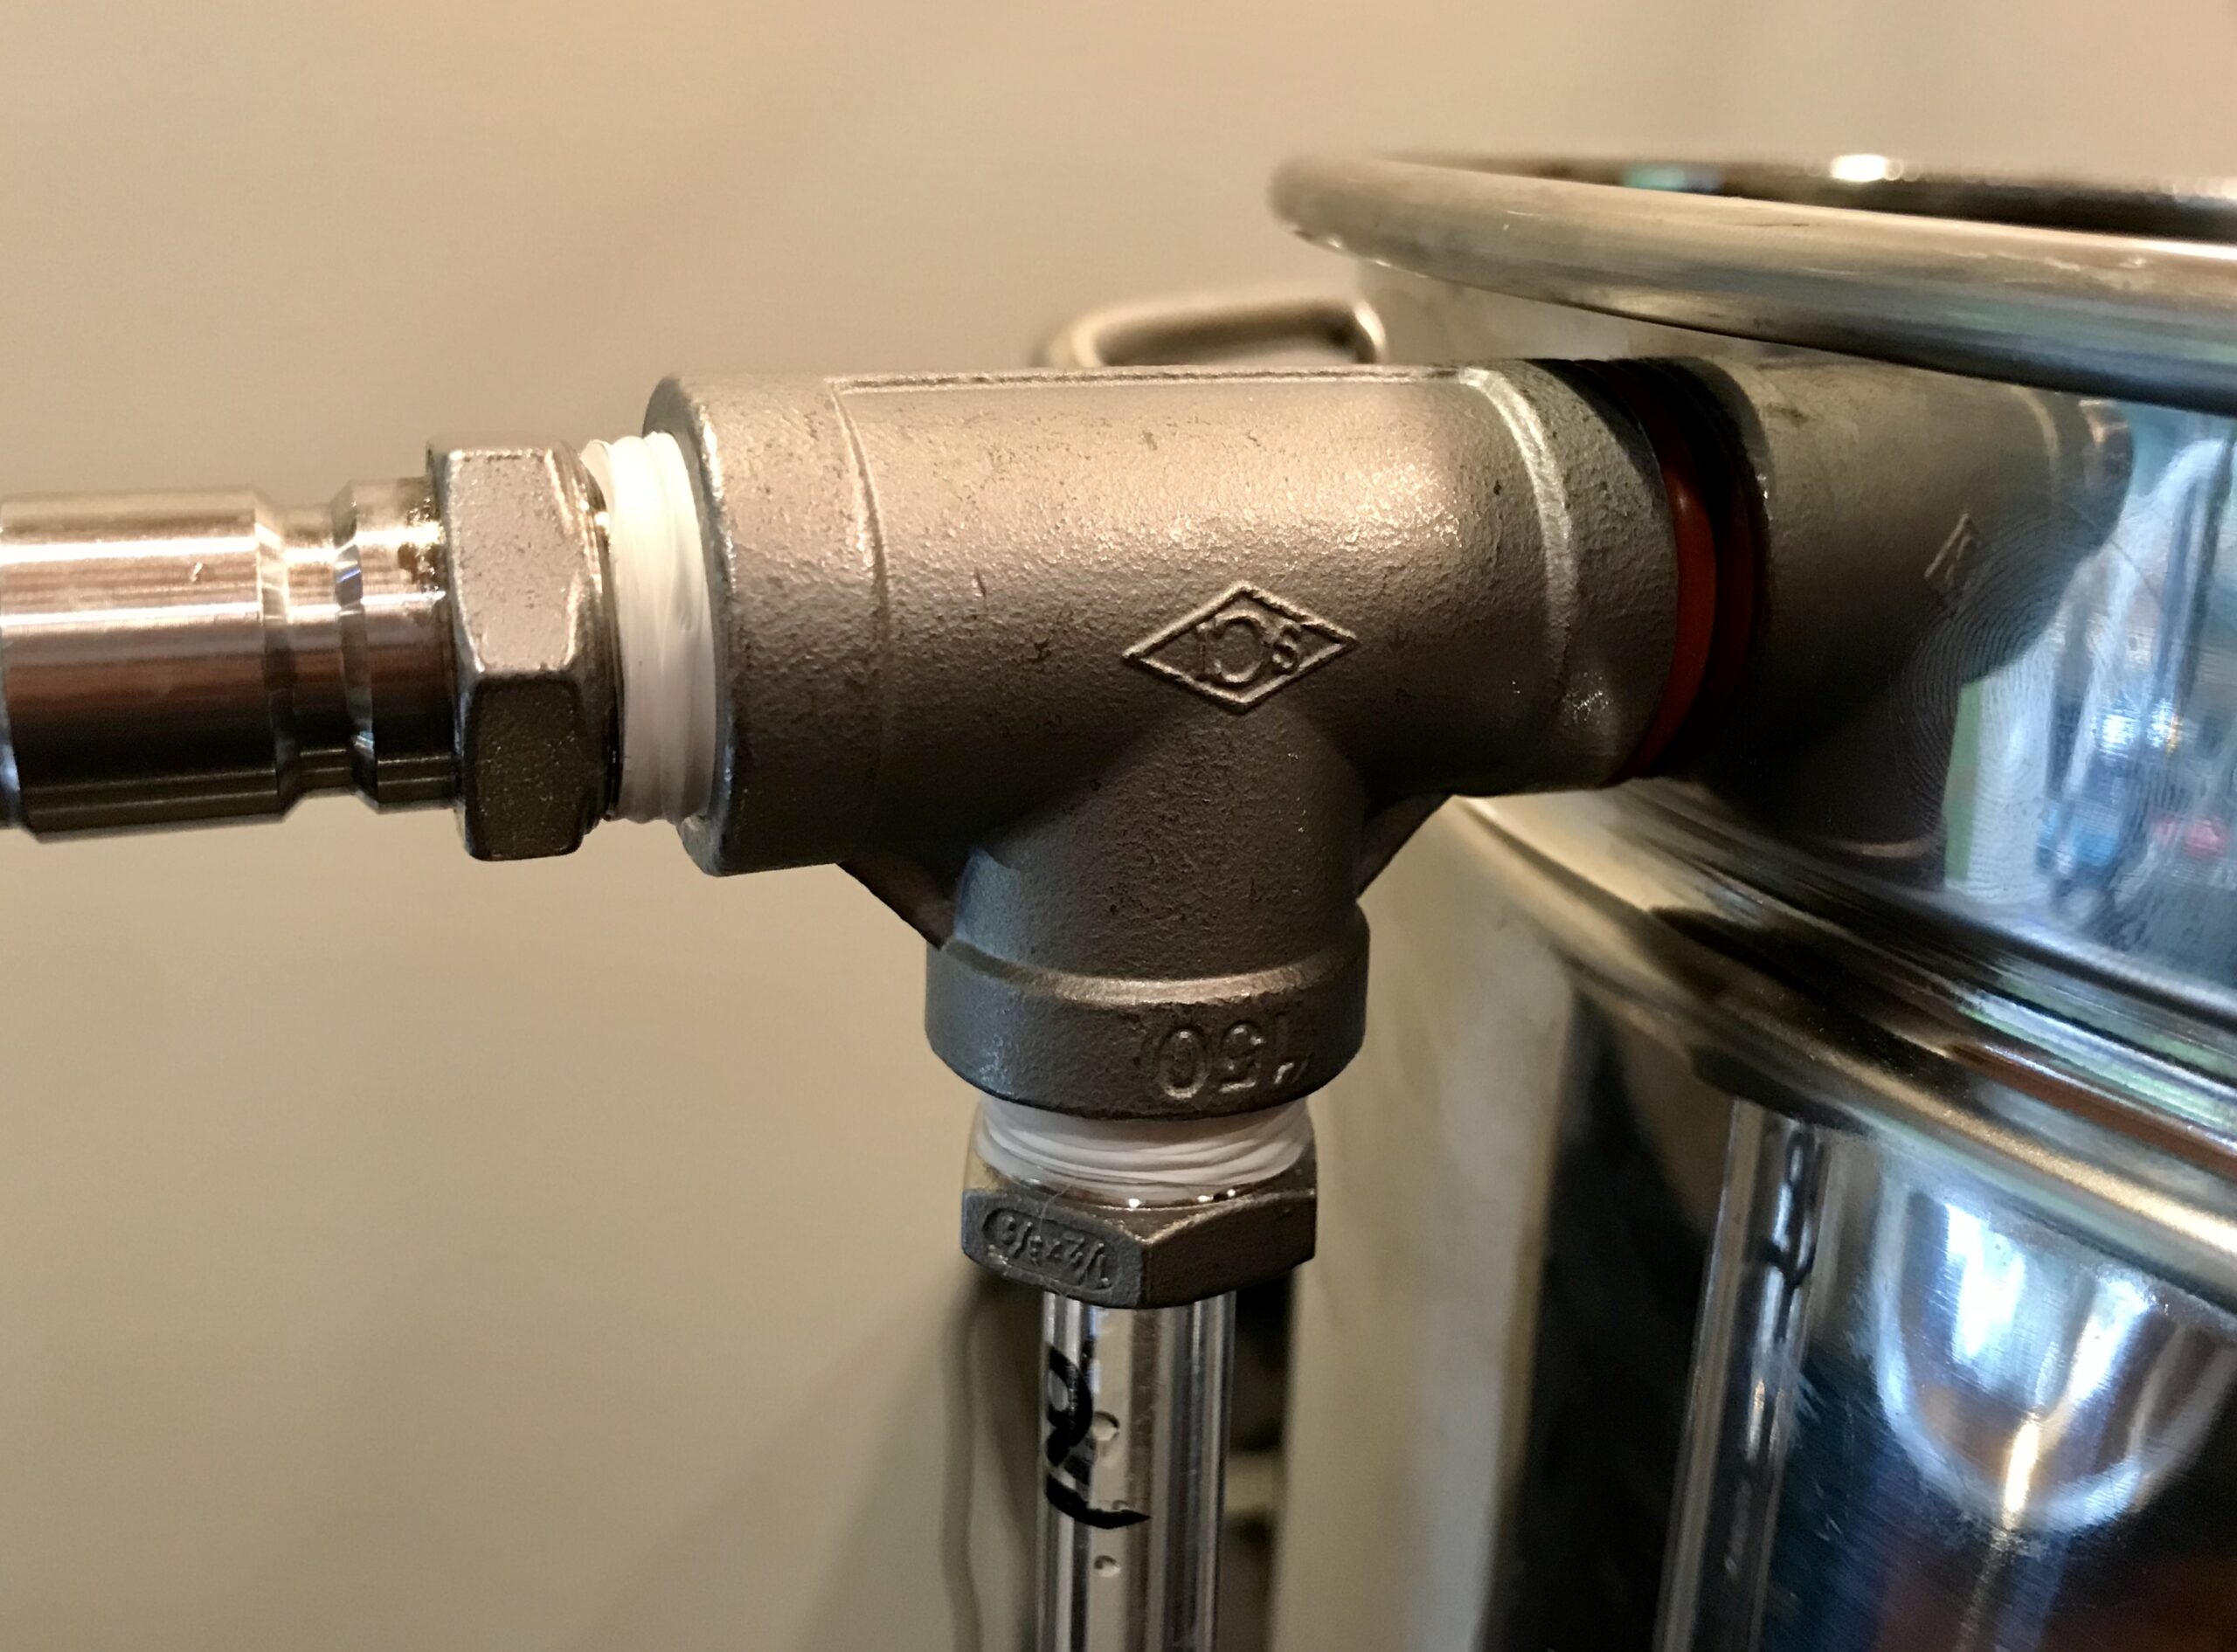
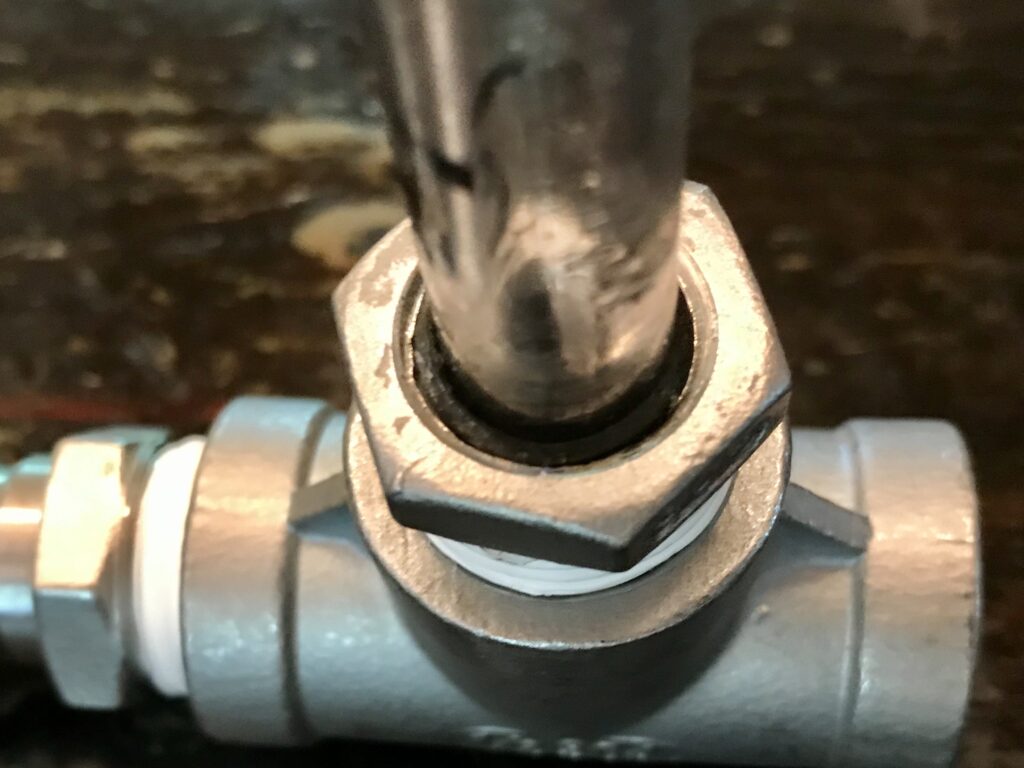
I was not a big fan of the sighgtlass just sticking out into thin air and being held by an eyebolt near the top of the pot. Instead I opted for something that would reattach the top back to the kettle. It feels a bit more solid and looks better in my opinion. By using a similar NPT tee at the top of the sight glass, this can now be the recirculation return port.
I find this more convenient than having the re-circulation port on the lid. While it seemed like a nice idea, it turned out to be a bit annoying to not be able to lift the lid without always having to turn off the pump (or forget it and make a mess). This way, the lid is free of fittings and the kettle can be opened without a fuss.
Sight Glass Assembly
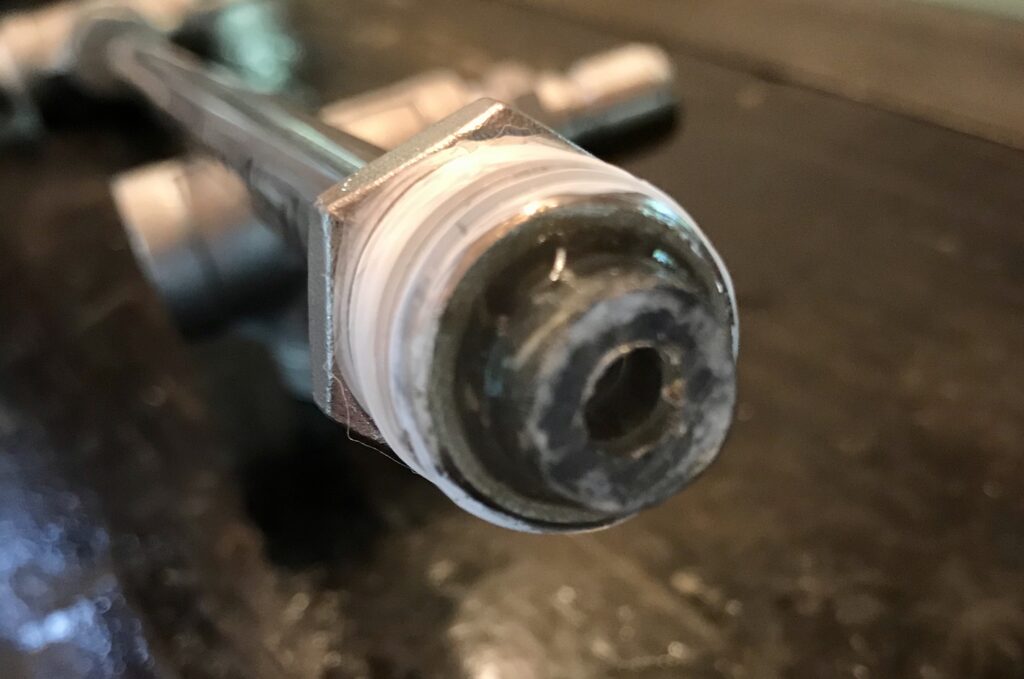
To put together the top part of the sight glass, i got a couple of stainless hex reducing bushings from brewhardware.com and a stainless steel tee.
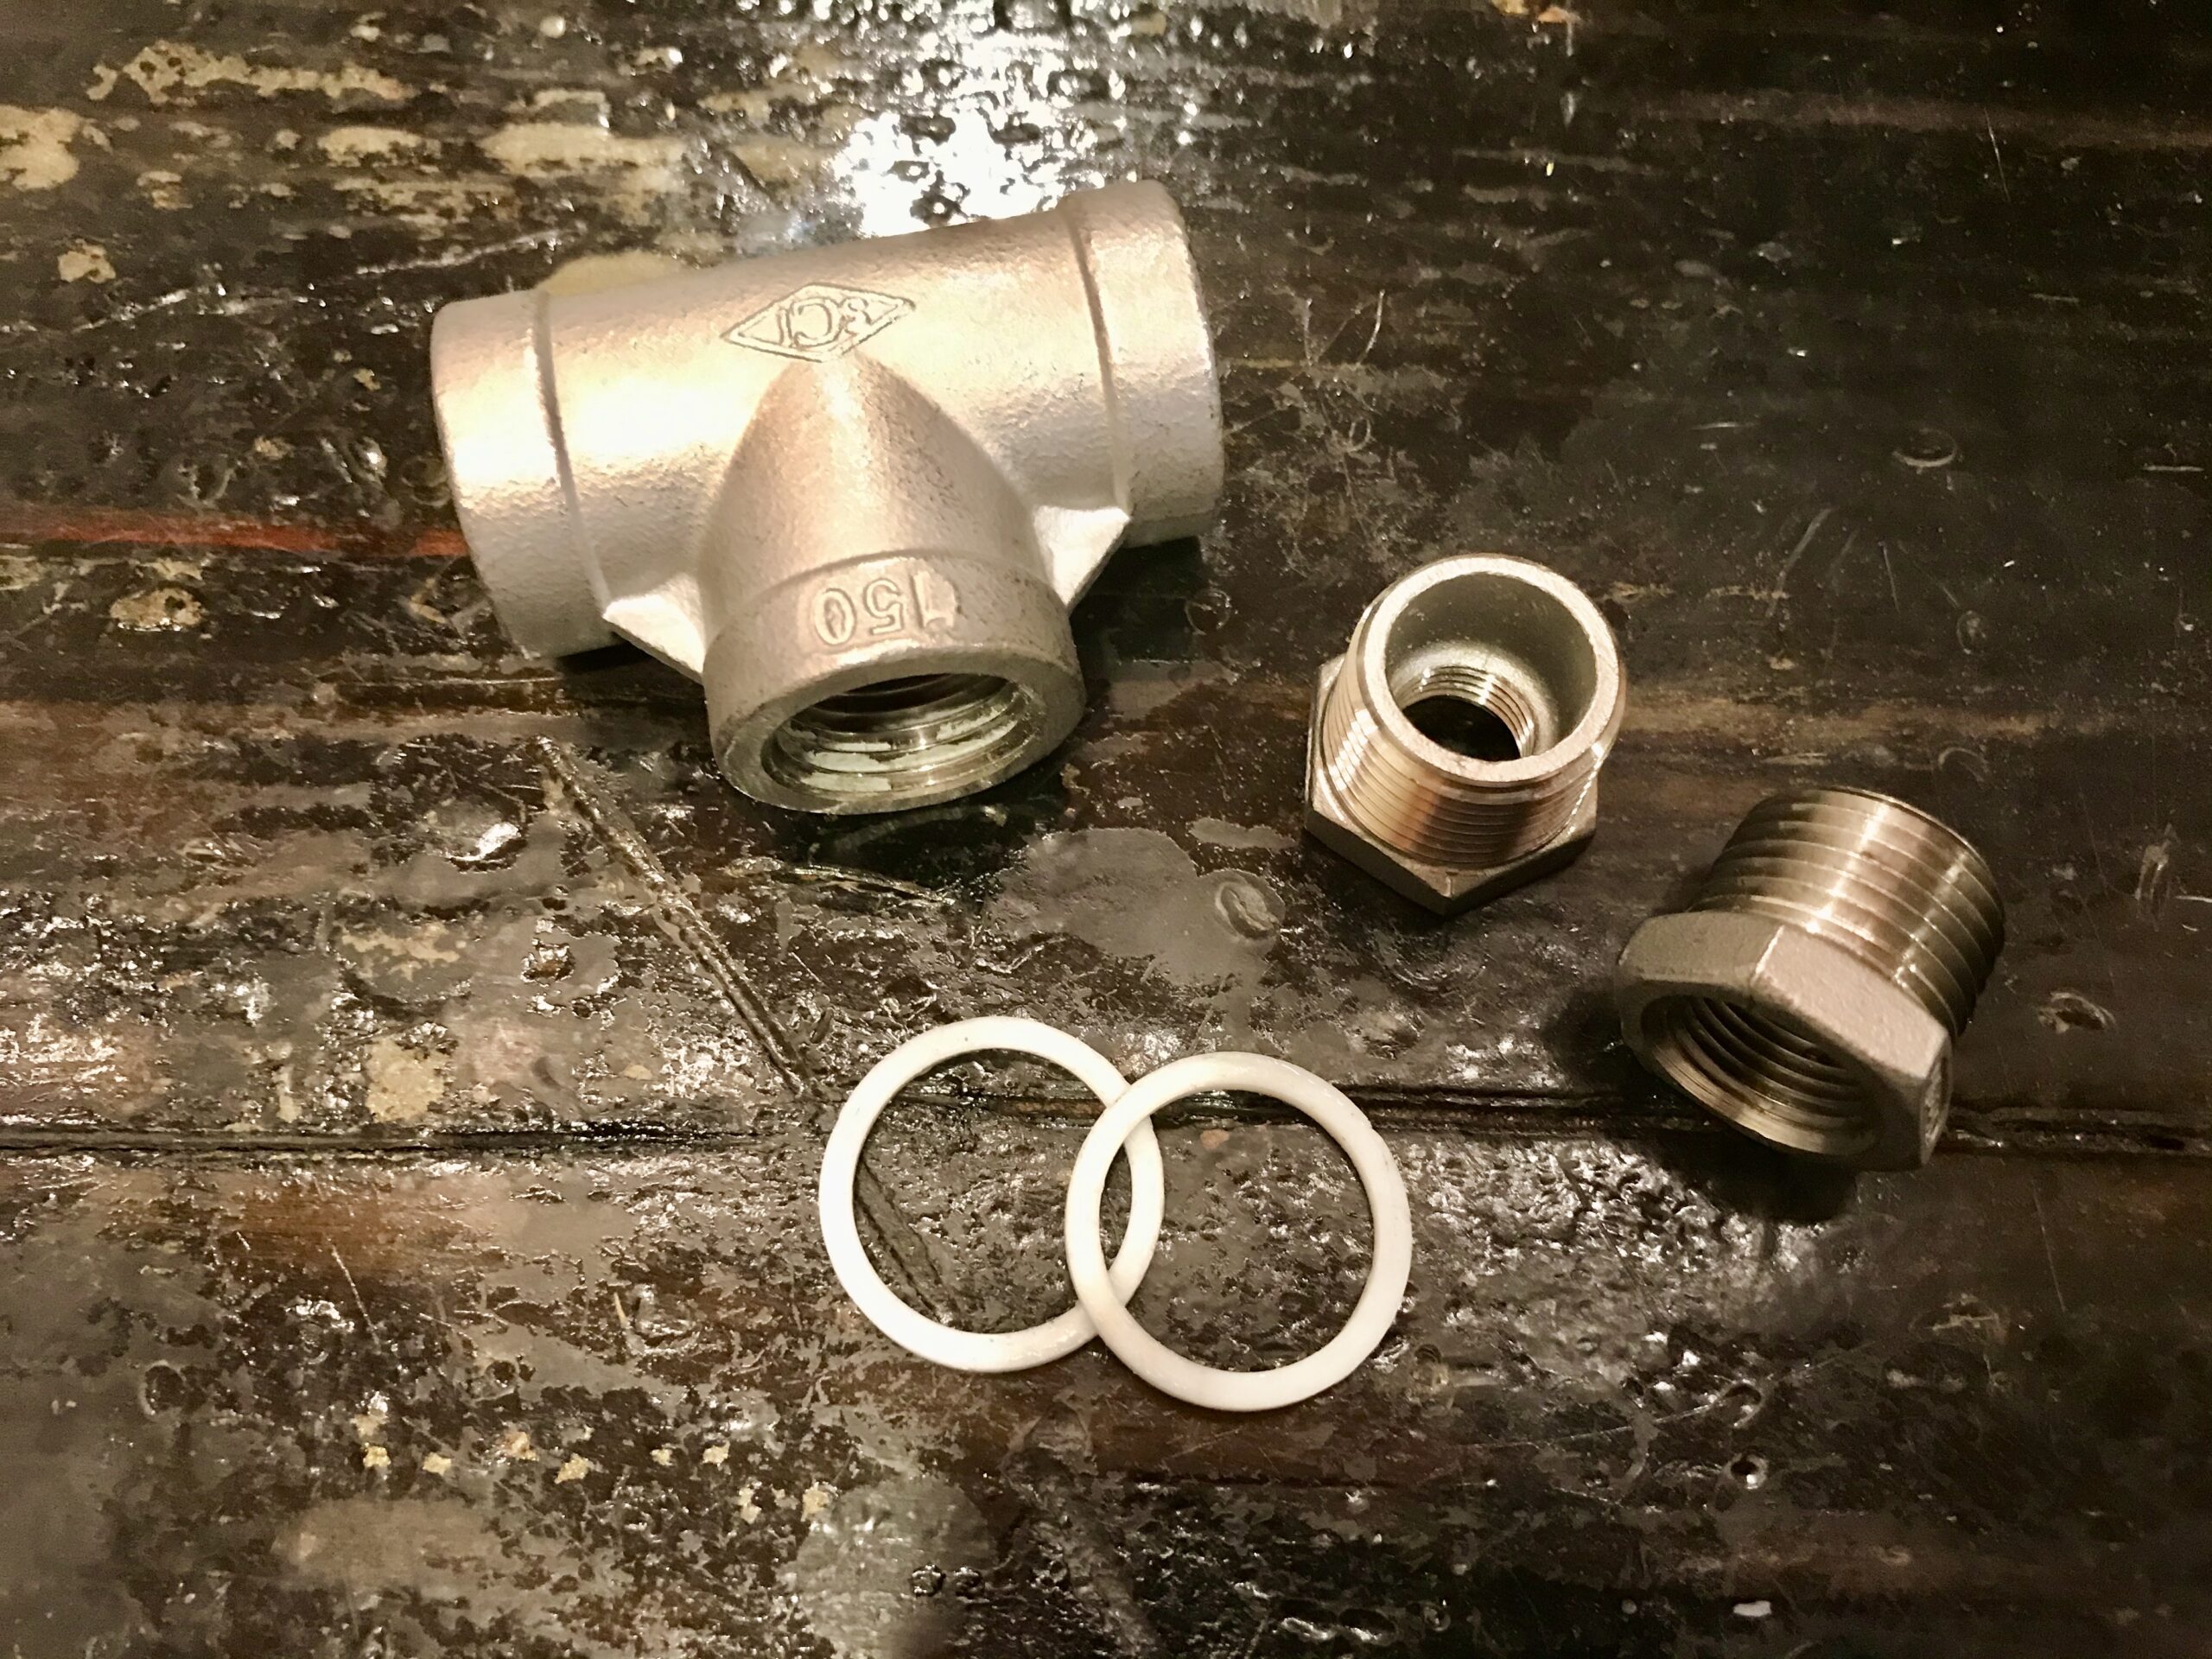
The bushing are 1/2″ male and 3/8″ female. The female size on the sigh glass end is important for fitting the sight glass tube. The female size on the bushing that will hold the sightglass tee attached to the kettle is not so important. I already had a 3/8″ nipple to the other side for recirculation so i went with 3/8″.
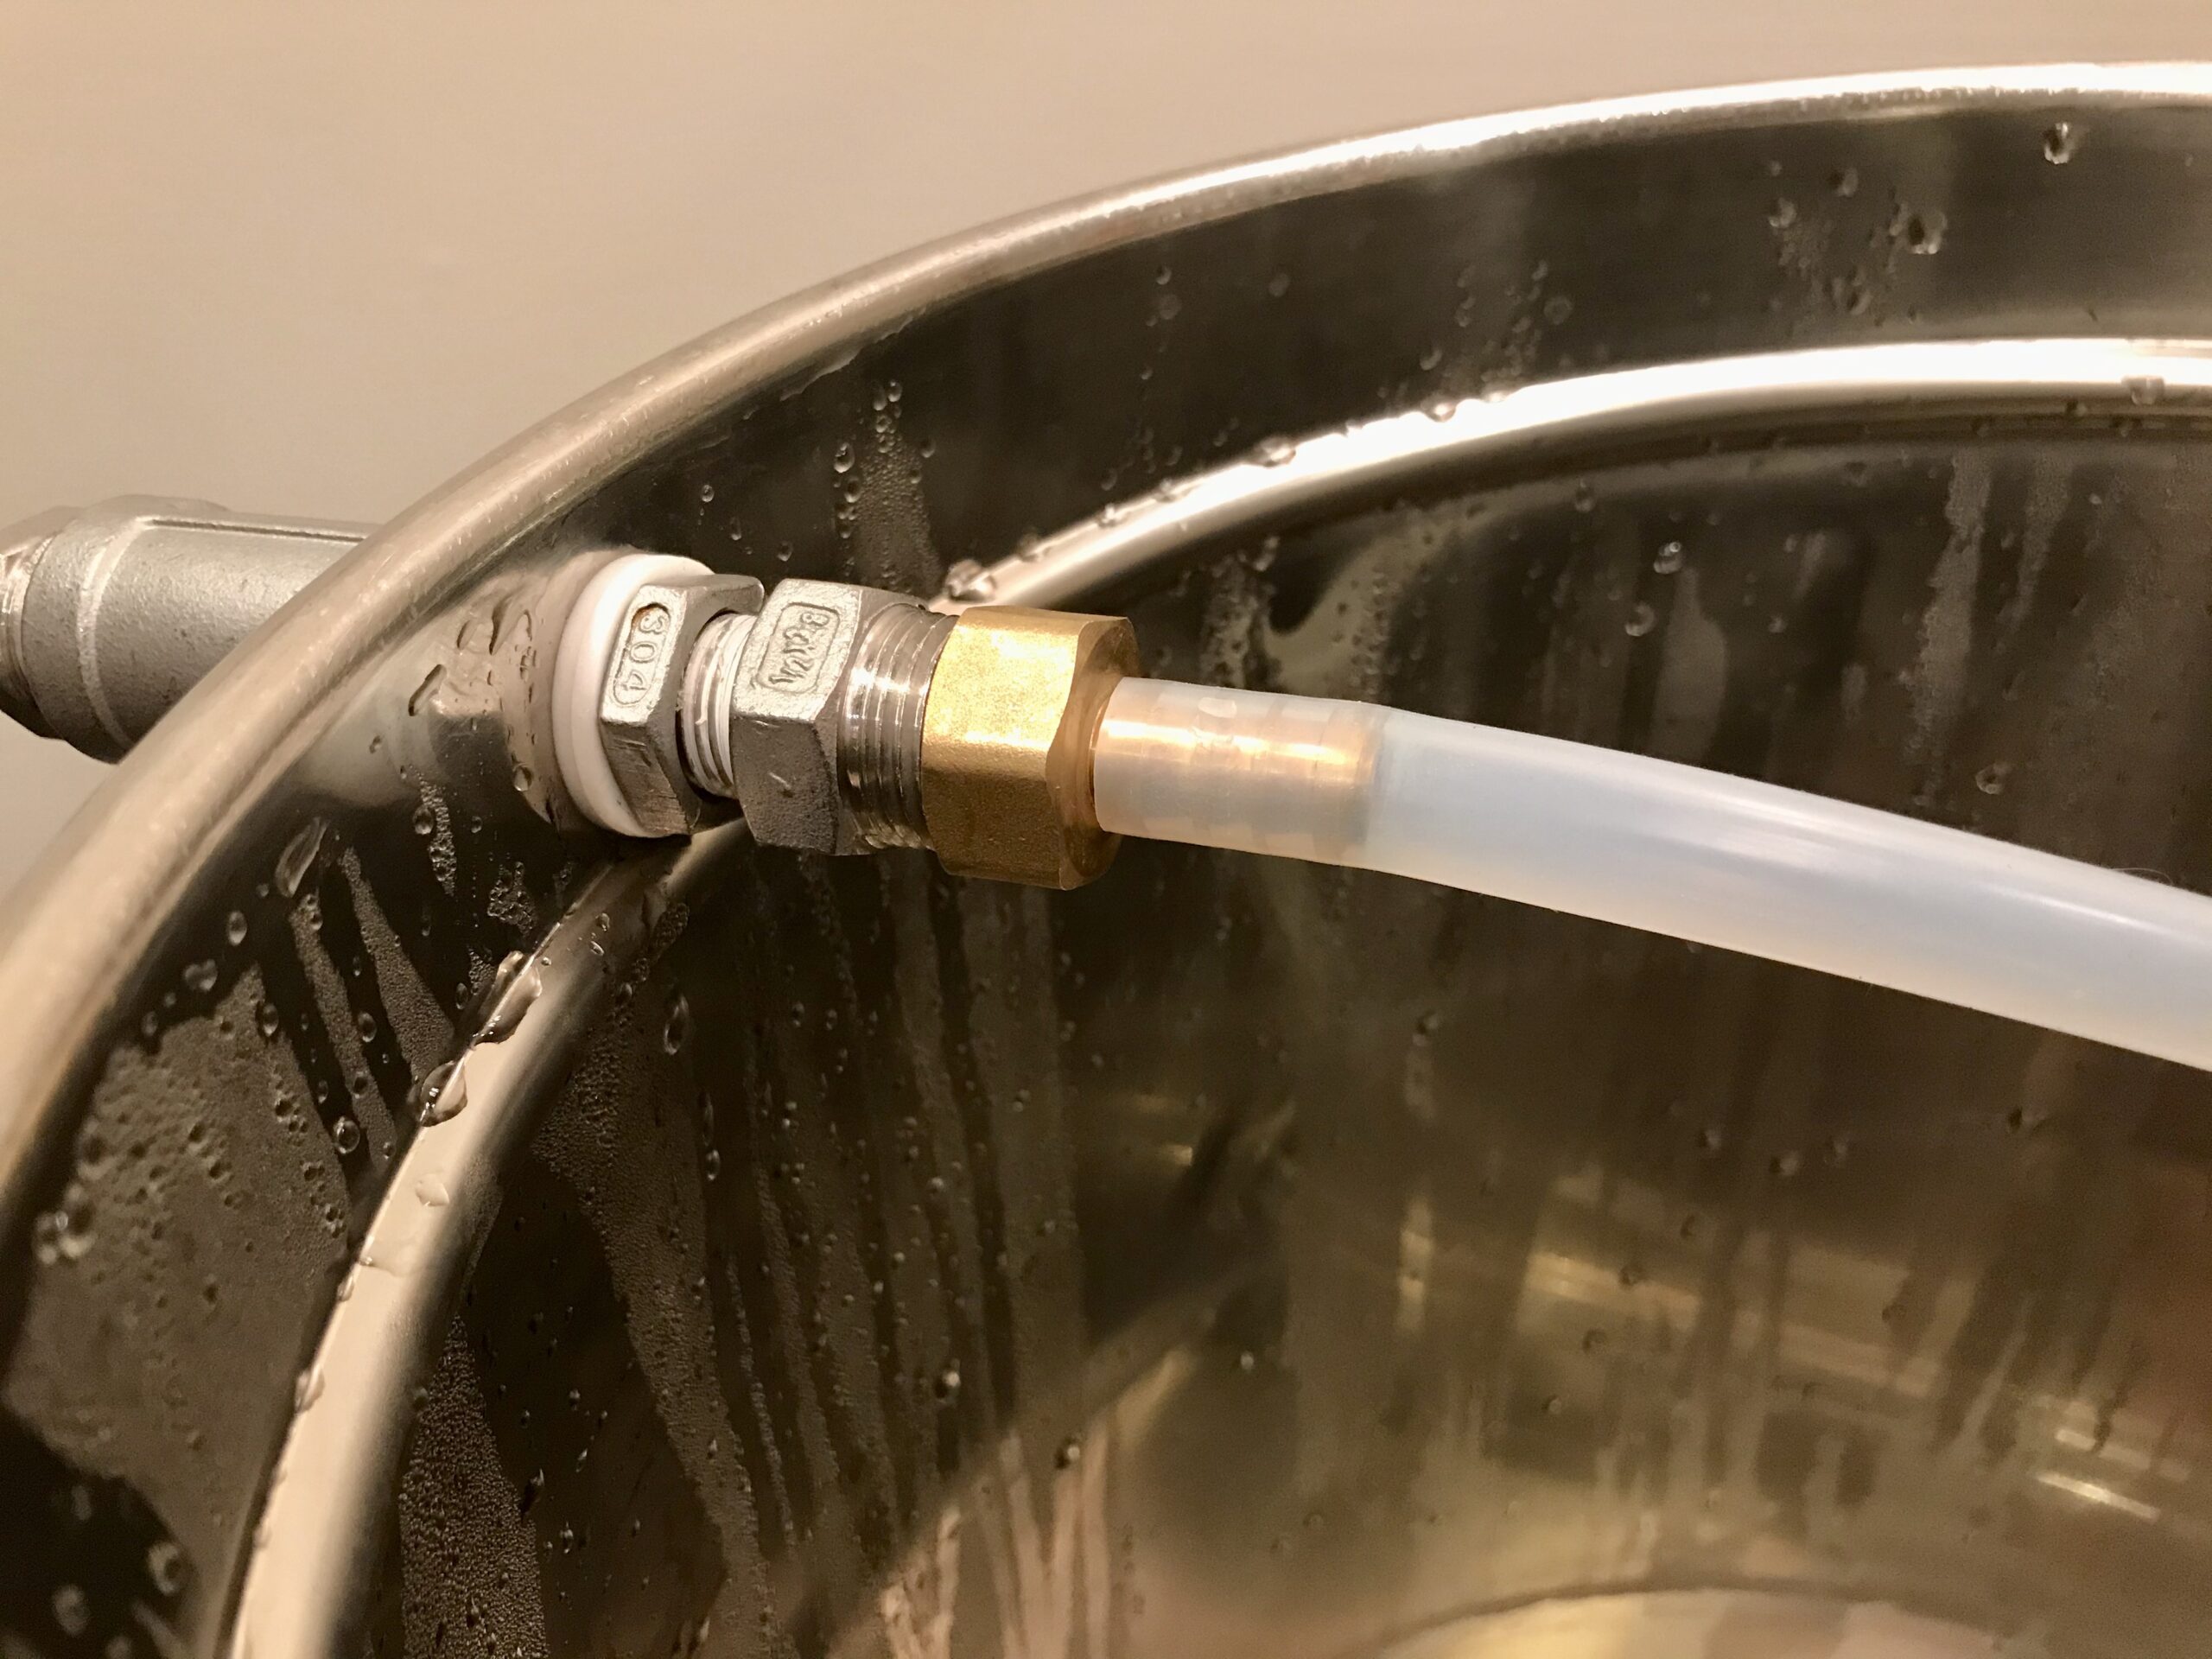
The sightglass tube is smaller than the 3/8″ inch opening so there is some play. To center it. i used a thin strip of rubber inside the bushing and pushed the tube through. To seal everything up, I used epoxy on the top side of the bushing, joining the sight glass plastic with the bushing metal. I tried using caulking but that always ended up leaking. I believe it was because after the caulking had cured, the fittings were moved around to be screwed in and tightened, breaking the fragile seal made by the caulking. Epoxy is a strong bond glue, so there’s no issue with handling the hardware and risking breaking the seal.
So there it is, sight glass/recirculation return installed!
Here’s a clip of the recirculation. I’ve not quite figured out yet how to terminate the recirculation. For the next brew, I’ll probably just let the a bit of hose sit on top of the liquid and leave it at that.
Note the water flowing down the sightglass. This does not seem to be a problem but i am considering perhaps sealing the top of the tube in the future and drilling a tiny hole somewhere near the top of the tube, to let air out as liquid goes in.
Part List
| Component | Link | Price |
|---|---|---|
| Sightglass | Brewhardware | 28.00 |
| Stainless Tee | Brewhardware | 4.00 |
| Bushings | Brewhardware | 4.00 |
| Total | | 36.00 |